

Key Takeaways
- Choose work boots based on job site hazards, surfaces, weather, and workplace requirements—not appearance alone.
- Confirm the required safety markings and protection, including toe, puncture, or electrical resistance.
- Match outsole traction to the conditions, such as wet floors, mud, snow, or uneven ground.
- Consider waterproofing, breathability, insulation, and support based on the demands of the workday.
- Test the fit with regular work socks and check for heel movement, pressure points, and toe room.
- Inspect boots regularly and replace them when the tread, structure, or protective features are damaged.
Why One Pair of Work Boots Does Not Fit Every Job
A boot that feels excellent on a smooth indoor floor may be a poor choice for a muddy landscape site or a winter delivery route. Likewise, a highly insulated waterproof boot may be unnecessary and uncomfortable for a warm indoor facility. Start with workplace rules and required protection, then narrow the choices by surface, weather, and daily tasks. The most expensive boot is not automatically the best boot for the job.
Start With the Hazards Underfoot
Before comparing leather types or lacing systems, take stock of a normal shift. Ontario construction projects require workers to wear protective footwear, so they should confirm the job site's requirements before buying a pair. The province's construction-project footwear rule is a useful reminder that workplace requirements come before personal style preferences.
- Identify anything that could fall, roll, or strike the foot.
- Look at the walking surface. Is it wet, oily, icy, muddy, sharp, loose, or uneven?
- Consider puncture, electrical, heat, chemical, static, or water exposure.
- Think about the work itself, including climbing, driving, kneeling, standing, or carrying materials.
Choose the Right Safety Toe
Safety toes are made from different materials, but the material alone does not tell you whether a boot meets the protection required for your work. Check the footwear marking and confirm that the rating matches the hazard and your employer's policy.
- Steel toe: A common choice for impact and compression hazards. It can add weight and is metallic.
- Composite toe: Usually non-metallic and often lighter than steel, which may appeal to workers who spend long hours walking or working in cold conditions.
- Aluminum toe: A metallic option that can be lighter than steel while still providing certified protection when properly rated.
- Soft toe: Suitable only when the job does not require impact or compression protection.
The Canadian guidance on safety footwear also emphasizes choosing certified footwear according to the specific hazard, including impact, puncture, electrical, and surface conditions.
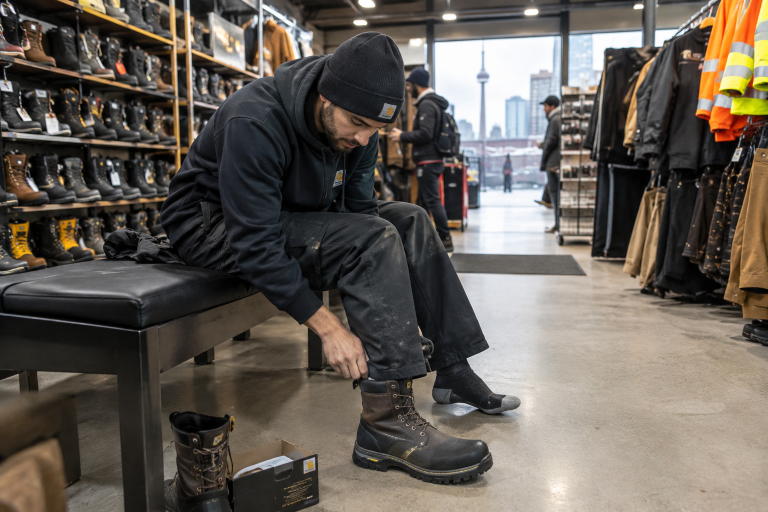
Match the Outsole to the Surface
Outsole design has a major effect on day-to-day confidence. For smooth indoor floors, choose a sole designed for slip resistance without aggressive lugs that may feel awkward on flat surfaces. Mud, loose soil, and landscaping sites generally call for a deeper tread to release debris. On concrete and asphalt, cushioning and a stable platform can matter as much as grip. For snow and ice, do not assume that waterproofing equals slip resistance. Look for winter-appropriate traction, keep soles clear of packed snow, and slow down when conditions change. Roofing and ladder work can benefit from secure heel construction, dependable grip, and enough forefoot flexibility to move naturally.
Waterproofing, Breathability, and Toronto Weather
Water-resistant leather can handle occasional moisture, while waterproof membranes are better suited to regular rain, slush, and wet grass. Rubber footwear can offer better protection against heavy mud or standing water, but it may feel warmer and less breathable during active summer work. Choose waterproofing for the conditions you often face, not for an unusually rainy day. Wet socks can increase friction and discomfort, so keep a spare pair on hand when conditions are unpredictable. After work, remove dirt and road salt, loosen the laces, and let the boots dry away from radiators, heaters, or direct high heat.
Fit Matters More Than Extra Features
A boot can have the right toe cap and outsole but still be a poor purchase if it pinches, slips at the heel, or leaves no room for natural toe movement. Fit should be tested before focusing on appearance or extra features.
- Try boots on later in the day, when feet may be slightly larger.
- Wear the work socks and any approved supports you normally use.
- Make sure toes have room without allowing the heel to lift.
- Walk on a firm surface and test stairs if possible.
- Check both feet, and fit the larger foot if they differ in size.
Comfort Features for Long Shifts
Long shifts reward practical comfort features: stable heels, supportive uppers, appropriate ankle coverage, cushioning, and replaceable insoles. A lighter boot may reduce fatigue for a warehouse worker walking on polished concrete, but it should never replace the protection required for the job. A road worker, utility worker, or landscaper may value stronger ankle support and deeper traction over a lighter feel.
Materials, Break-In, and Care
Choose Materials for the Workday
- Leather: Durable and supportive, though some pairs need a gradual break-in period.
- Synthetic materials: Often lighter and may dry faster, but durability varies by construction.
- Rubber: Practical for persistent moisture, mud, and messy outdoor tasks, with less airflow than many leather designs.
- Hybrid designs: Can combine flexibility, support, and weather protection for mixed indoor and outdoor work.
Break In Boots Without Forcing It
Wear new boots for short periods before relying on them for a full shift. Use normal work socks, lace them fully, and watch for rubbing, numbness, pressure points, or heel movement. Adjust lacing before adding inserts. Severe pain is not a normal break-in requirement and may indicate the wrong size or shape.
Know When Replacement Is Necessary
Inspect boots regularly for worn tread, cracks, separated seams, water entry, damaged eyelets, exposed toe caps, or lost internal cushioning. Replace footwear after a significant impact or puncture event, even if the damage is not obvious. Persistent foot pain that begins after a boot loses its shape or support is another reason to reassess the pair.
A Simple Toronto Work Boot Buying Checklist
- Confirm the workplace safety requirements and required markings.
- Identify the hardest surface and most serious hazard of the shift.
- Choose toe, puncture, electrical, or static protection as required.
- Check traction for wet, oily, snowy, muddy, or uneven ground.
- Decide whether waterproofing, insulation, or breathability matters most.
- Try boots on with regular work socks before wearing them outdoors.
- Review the return policy while the footwear is still clean and unworn.
Choose the Hardest Part of the Shift
The best work boot is the one that can handle the toughest real-world conditions you face, whether that is a wet loading dock, an icy sidewalk, a concrete floor, a construction site, or a muddy service call. Start with required protection, then choose the traction, weather resistance, fit, and support that make the boot workable from the first hour of the shift to the last.
Conclusion
Choosing work boots for Toronto conditions starts with understanding the hazards and surfaces workers encounter throughout a shift. Required safety protection should come first, followed by traction, weather resistance, fit, and comfort. Al Flaherty's offers a work-boot selection for shoppers, comparing footwear for demanding jobs and changing conditions. Before buying, confirm workplace requirements, try on boots with regular work socks, and check that they provide adequate support without restricting movement. Regular cleaning and inspection can also help workers identify wear or damage before it affects the boot’s performance. A practical choice should support the workday while meeting the protection the job requires.

FOLLOW ME ON SOCIAL MEDIA


No comments:
Post a Comment
I love reading and responding to comments but in order to get my reply you must ensure you are NOT a no-reply blogger. If you are, here are some quick steps to change that!
1. Go to the home page of your Blogger account.
2. Select the drop down beside your name on the top right corner and choose Blogger Profile.
3. Select Edit Profile at the top right.
4. Select the Show My Email Address box.
5. Hit Save Profile.