

Key Takeaways:
- Regular cleaning prevents dirt buildup and maintains airflow.
- Inspect screens periodically for damage and repair promptly.
- Proper storage during off-seasons can prolong screen life.
Table of Contents:
- Regular Cleaning
- Inspecting for Damage
- Seasonal Storage
- Protecting Against Weather
- Lubricating Tracks and Hinges
- Upgrading Screen Materials
Window screens play a vital role in the comfort and health of your home, serving as a protective barrier that allows fresh air indoors while keeping insects, debris, and allergens outside. Properly maintained screens and unmissed window repairs help you maximize natural ventilation, save on energy costs, and even safeguard your furniture by filtering out dust and debris. Regular attention to your window screens is key, especially if you live somewhere with frequent seasonal changes or high pollen counts. Minor issues, if left unchecked, can quickly lead to larger problems that compromise both comfort and efficiency. By implementing consistent care and proven strategies, you can extend the life of your window screens and keep them functioning at their best. Not only does proactive maintenance help avoid costly replacements, but it also supports the overall aesthetics of your home. Below, discover a comprehensive guide to the most effective habits and methods for keeping your window screens clean, functional, and durable all year round.
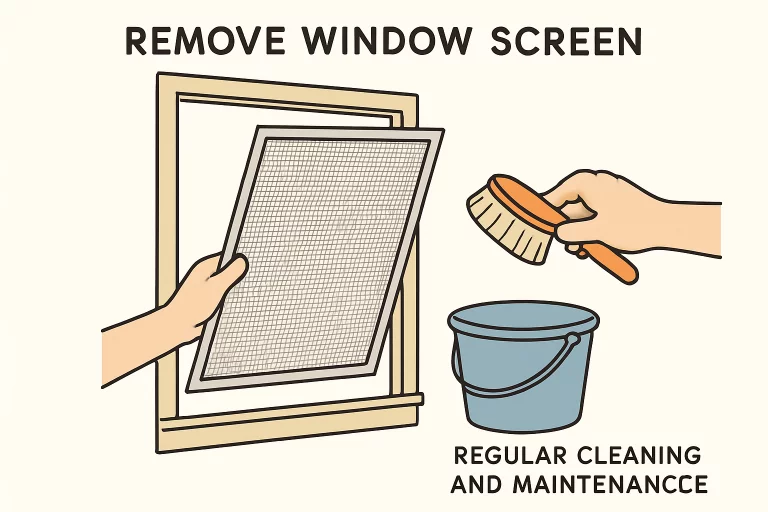
Regular Cleaning
Constant exposure to the outdoors means window screens accumulate more than just a little dust—they can become loaded with pollen, bird droppings, insects, and pollution over time. When not cleaned regularly, the mesh can clog, restricting the flow of fresh air into your home and leaving rooms feeling unpleasantly stuffy. Built-up grime can further weaken the mesh, accelerating deterioration and affecting indoor air quality.
- Begin by carefully removing each screen from its window frame. If screens are excessively dirty, bringing them outside for cleaning is a good idea to prevent making a mess indoors.
- Sweep over both sides of the screen using a soft-bristle brush or a vacuum cleaner with a gentle brush attachment. Focus on spots where dirt and spider webs tend to settle, such as the screen corners and frame edges.
- Fill a bucket with warm water and a small amount of mild dish soap. Always avoid strong, abrasive cleaners, since these can wear down the mesh and harm the screen frame’s finish.
- Gently scrub the mesh with a soft cloth, sponge, or brush. Pay special attention to stubborn spots, and don’t forget the frames where grime may collect unseen.
- Rinse each screen thoroughly using a gentle stream from a garden hose or tap. Avoid high-pressure settings, which can easily stretch or tear the mesh.
- Set the screens aside to air dry completely before reinstalling to help prevent mold or mildew from developing.
Inspecting for Damage
Routine visual inspections of your window screens ensure you catch minor problems before they turn into costly repairs. Damaged or loose screens fail to block pests and can quickly diminish your property's curb appeal.
- Carefully examine the mesh for tears, holes, or punctures. Even the smallest opening can let bugs inside or pollen and dust enter your living space.
- Check the screen frame for any signs of warping, bending, or loose joints. A compromised frame makes it difficult for the screen to sit flush against the window, reducing its effectiveness.
- Inspect metal and plastic screen components for rust, corrosion, and general wear. Over time, weather exposure can weaken materials, making them more prone to breakage.
Minor mesh damage can often be quickly fixed using DIY repair kits at home improvement stores, saving you from unnecessary replacements. Full mesh replacement may be necessary if there are extensive rips or the frame is warped. Swift action ensures that your screens remain functional and visually appealing, which is particularly important if you’re preparing your home for sale or want to maintain its long-term value.
Seasonal Storage
Homes in regions with harsh winters or severe seasonal weather can benefit from removing window screens during the off-season. Exposure to snow, ice, and repeated freeze-thaw cycles can cause screen materials to become brittle or crack, leading to premature wear and tear. After cleaning and thoroughly drying your screens, mark each one with its window location for quick reinstallation next season. Store screens in a dry, climate-controlled area such as a basement, garage, or utility room. If possible, stand them upright or lay them flat on a shelf—never lean heavy objects atop them as this can deform the frame. Come spring, reference your labels and reinstall for another protection season and clear views.
Protecting Against Weather
Weather and environmental exposure can damage window screens in various ways. Prolonged direct sunlight may fade and break down mesh materials, while storms and high winds can bend or dislodge screens. Taking a few smart precautions can help you avoid expensive hassles.
- Spray screen frames and mesh with a UV protectant that acts as a barrier against sun damage, especially on windows that get full sunlight most of the day. This extra step guards against fading and extends the life of metal and plastic parts.
- If you expect storms with strong winds or hail, temporarily removing screens is advisable. This can shield them from bending, tearing, or being wrenched from the frame by flying debris.
- Opt for rust-resistant materials like aluminum or stainless steel for homes in humid climates or near the coast. These materials can withstand moisture and reduce routine corrosion problems.
By being proactive about weather and environmental exposure, you’ll maintain the integrity and attractiveness of your window screens, reduce the frequency of significant repairs and ensure long-term savings.
Lubricating Tracks and Hinges
Smoothly operating window screens and sliding screen doors depend on tracks and hinges free of dust, grit, and buildup. Over time, accumulated debris can cause screens to stick, squeak, or jam, putting additional stress on frames and making routine use a chore.
- Start by vacuuming the tracks to remove any loose dirt, then use a small brush to clear out stubborn debris from the smaller crevices and corners.
- Wipe down surfaces with a damp cloth and let them dry thoroughly before applying any lubricant.
- Apply a silicone-based lubricant to tracks and moving hinges. Silicone works best as it resists attracting additional dirt and dust, unlike oil-based options, which can gum up with debris over time.
Periodic care of these moving parts ensures the effortless operation of sliding and hinged screens, helps prevent unnecessary repairs, and makes opening and closing your windows a breeze.
Upgrading Screen Materials
If your household includes pets, allergy sufferers, or if you notice screens frequently breaking despite your best efforts, it might be time to upgrade to premium screen options better suited to your needs. Modern window screen technology offers several targeted solutions:
- Pet-resistant screens: Constructed from rugged polyester or vinyl-coated mesh, these screens are made to withstand clawing, scratching, and playful pets.
- Solar screens: Featuring specially designed mesh that blocks excess UV rays and reduces summer heat gain, solar screens lower air-conditioning costs and reduce glare without sacrificing natural light or views.
- Air filtration screens: Engineered to keep out fine dust, pollen, and other allergens, these screens are ideal for those with sensitivities or homes in high-pollution areas. They maintain airflow while significantly improving indoor air purity.

FOLLOW ME ON SOCIAL MEDIA


No comments:
Post a Comment
I love reading and responding to comments but in order to get my reply you must ensure you are NOT a no-reply blogger. If you are, here are some quick steps to change that!
1. Go to the home page of your Blogger account.
2. Select the drop down beside your name on the top right corner and choose Blogger Profile.
3. Select Edit Profile at the top right.
4. Select the Show My Email Address box.
5. Hit Save Profile.