

Key Takeaways
- Moisture can enter a crawl space through soil, rainwater, plumbing leaks, condensation, and humid outdoor air.
- Stopping water at its source should come before adding a dehumidifier or sealing the crawl space.
- Gutters, downspouts, grading, vapor barriers, drainage, air sealing, and humidity control each serve different purposes.
- Vented and sealed crawl spaces can perform differently depending on climate, construction, and maintenance.
- Standing water, mold, wood damage, or unsafe conditions call for a qualified professional.
Table of Contents
- Why Crawl Space Moisture Matters
- Where Crawl Space Moisture Comes From
- Warning Signs to Watch For
- How to Check the Space Safely
- Fix the Source First
- Vented vs. Sealed Crawl Spaces
- When Encapsulation May Fit
- A Simple Maintenance Plan
- Conclusion
Homeowners who notice odors, damp insulation, condensation, or recurring water issues should learn the signs you need crawl space encapsulation, while also considering simpler repairs such as drainage improvements, plumbing repairs, or a ground vapor barrier. The appropriate approach depends on the home’s design, local conditions, and severity of the moisture issue.
Why Crawl Space Moisture Matters
A persistently damp crawl space can affect floor framing, insulation, ductwork, and other materials below the home. Dampness may also contribute to musty odors, mold growth, wood decay, and conditions that attract some pests. Because air and moisture can move through gaps around pipes, ducts, floors, and walls, a crawl space problem may also influence comfort and humidity in the living area.
Where Crawl Space Moisture Comes From
Homes in warm, humid regions often need a plan tailored to local weather and soil conditions. Professional crawl space moisture control in Southeastern NC may involve several coordinated steps, especially when rainwater, high humidity, and ground moisture occur together.
Ground Moisture
Bare soil can release moisture into the crawl space as water vapor. A continuous ground vapor barrier helps limit that pathway when it is installed carefully, with seams and edges secured as needed. The Department of Energy explains that a properly installed crawl space floor barrier can reduce water vapor entering from the soil and should be part of a broader moisture-control strategy.
Rainwater and Drainage Problems
Roof runoff and surface water are common causes of crawl space moisture. Overflowing gutters, short downspouts, clogged drains, and soil that slopes toward the foundation can direct water exactly where it does the most harm. Water that repeatedly collects beside the home deserves attention before interior crawl space repairs are considered.
Plumbing, HVAC, and Condensation
Slow plumbing leaks, leaking drain lines, air-conditioning condensate problems, and sweating ducts can create damp areas without producing a dramatic flood. Check for wet insulation, mineral staining, drips, or water marks around visible pipes and equipment. Condensation can also occur when humid air touches cooler ducts, pipes, or other surfaces.
Warning Signs to Watch For
- Musty or earthy odors near lower floors.
- Standing water, wet soil, or water marks on foundation walls.
- Condensation on pipes, ducts, or other cool surfaces.
- Fallen, damp, or compressed insulation.
- Visible staining, mold-like growth, or darkened wood.
- Soft, uneven, or sagging floors above the crawl space.
- Repeated pest activity near vents, doors, or foundation openings.
One symptom does not always reveal the exact cause. For example, a musty odor may come from wet insulation, humid air, mold growth, or damp soil. Several clues appearing together are a good reason to investigate more closely.
How to Check the Space Safely
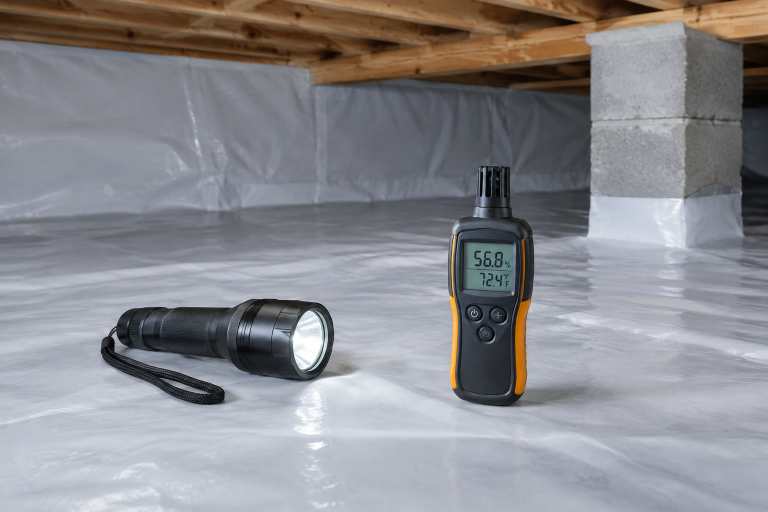
Start outside when possible. Inspect the access door, foundation walls, gutter outlets, downspouts, and the ground around the home. Use a flashlight to look into the crawl space and photograph visible concerns from a safe position. Note where water appears, whether it follows rain, and whether odors or humidity change with the seasons.
Do not enter a crawl space if there is major flooding, sewage, exposed wiring, unstable supports, aggressive pests, or suspected structural damage. A humidity meter can provide useful information, but one reading alone does not diagnose the source of moisture.
Fix the Source First
- Repair active plumbing leaks and HVAC drainage issues.
- Clean gutters and direct downspouts away from the foundation.
- Adjust grading or address surface drainage that sends water toward the house.
- Identify groundwater or recurring water entry that may require drainage work.
- Install or repair a ground vapor barrier after bulk-water issues are addressed.
- Use air sealing, conditioning, ventilation changes, or dehumidification when appropriate.
- Repair damaged insulation, ductwork, or wood only after the area is dry, and the moisture source is controlled.
A dehumidifier can help manage humid air, but it cannot stop rainwater, groundwater, or a plumbing leak from entering the crawl space. The Department of Energy’s crawlspace guidance emphasizes controlling soil moisture and drainage as part of a comprehensive solution.
Vented vs. Sealed Crawl Spaces
A vented crawl space allows outdoor air to move through foundation openings. In some situations, that airflow may help, but warm and humid outdoor air can also add moisture or create condensation when it reaches cooler surfaces. A sealed or conditioned crawl space limits outside air and typically combines a ground barrier with air sealing and an intentional humidity-control plan.
Neither approach is automatically right for every home. Local climate, flood exposure, existing insulation, HVAC layout, code requirements, and the condition of the foundation all matter. Changes to vents or insulation should be planned carefully rather than made solely because a neighboring home uses a different system.
When Encapsulation May Fit
Encapsulation generally refers to covering and sealing the crawl space floor and often the walls, then managing remaining moisture with drainage, conditioning, or dehumidification. It may be worth considering when moisture remains high after water-entry issues are addressed, when exposed soil is a major source of vapor, or when a home needs a more controlled crawl space environment.
It is not always the first repair. A home with rainwater collecting near the foundation may first need better gutters, downspout extensions, or grading. A crawl space with a leaking pipe needs the leak repaired. Persistent standing water may require drainage or sump-related work before the area is sealed.
A Simple Maintenance Plan
Monthly and Seasonal Checks
- Watch for new odors, condensation, and indoor humidity changes.
- Make sure the crawl space access door closes securely.
- Clean gutters before heavy-rain periods and confirm downspouts discharge away from the home.
- Inspect the area after storms and during long humid periods.
- Check visible pipes, ducts, and condensate lines for leaks or sweating.
Annual Checks
Review the condition of the vapor barrier, insulation, drainage components, and any installed dehumidifier or sump pump. The EPA notes that high humidity and bare-earth crawl spaces can support hidden mold growth, and that moisture in a crawl space can move into other parts of a building through openings. Its guidance on crawl spaces and humidityreinforces the value of finding and controlling moisture early.
Conclusion
Effective crawl space moisture control starts with diagnosis. Identify whether the problem is soil vapor, rainwater, poor drainage, a leak, condensation, humid air, or a combination of causes. Then choose repairs in the right order. Routine inspections and prompt action can help prevent a small moisture concern from becoming a larger repair project.

FOLLOW ME ON SOCIAL MEDIA


No comments:
Post a Comment
I love reading and responding to comments but in order to get my reply you must ensure you are NOT a no-reply blogger. If you are, here are some quick steps to change that!
1. Go to the home page of your Blogger account.
2. Select the drop down beside your name on the top right corner and choose Blogger Profile.
3. Select Edit Profile at the top right.
4. Select the Show My Email Address box.
5. Hit Save Profile.