

Key Takeaways
- Start with measurements, sun patterns, access points, and intended uses before choosing equipment.
- Separate cooking, dining, relaxing, and heat areas so people can move through the space safely.
- Follow appliance instructions and local requirements for fuel, electricity, ventilation, and clearances.
- Use shade, lighting, flexible seating, and storage to make the area more useful across seasons.
- Regular cleaning and inspections can help outdoor appliances operate reliably.
An outdoor living area can become a favorite place for weeknight meals, quiet mornings, and relaxed gatherings. The best results come from planning the layout before buying furniture or equipment. Exploring outdoor and indoor gas appliances for your home can also help you consider which cooking or heating options best suit your space's size and purpose.
A thoughtful plan should account for how people enter the yard, where food will be prepared, where guests will sit, and how the area will perform in sun, wind, rain, and cooler temperatures. Prioritizing those practical details makes it easier to create a space that feels inviting without becoming crowded or difficult to maintain.
Start With The Space
Begin with a basic site assessment. Measure the patio, deck, or yard, then note doors, stairs, railings, windows, property lines, trees, and existing utility connections. Observe where direct sunlight falls during the hours the space will be used most often. A sunny breakfast area may need shade later in the day, while a dinner area may need stronger lighting after sunset.
Make a simple sketch and mark the locations for cooking, dining, seating, storage, lighting, and walking paths. Include the swing of exterior doors and enough open space for chairs to be pulled back. This early step helps prevent a common problem: placing large items first, only to discover that guests must squeeze through the cooking area to reach the table.
Plan For How People Move
Not every outdoor area needs to be large, but it should have clear zones. Keep the busiest route, such as the path from the house to the table, away from hot appliances and open flames. This arrangement makes it easier to carry food, drinks, and dishes while reducing distractions for the person cooking.
- Cooking zone: Grill or cooktop, prep surface, cooking tools, and waste container.
- Dining zone: Table, chairs, serving space, and lighting that supports meals after dark.
- Relaxation zone: Lounge seating, side tables, shade, and room for conversation.
- Storage zone: Covers, cleaning supplies, cushions, and approved fuel storage where applicable.
- Heat zone: A fire feature or outdoor heater positioned outside of primary walking paths.
Place Heat And Fire Features Carefully
Fire pits, fireplaces, patio heaters, and grills require deliberate placement. Follow the manufacturer's instructions for clearances, foundation requirements, ventilation, and fuel connections. The U.S. Fire Administration advises homeowners to keep grills away from siding, deck railings, eaves, and overhanging branches as part of its outdoor fire safety guidance.
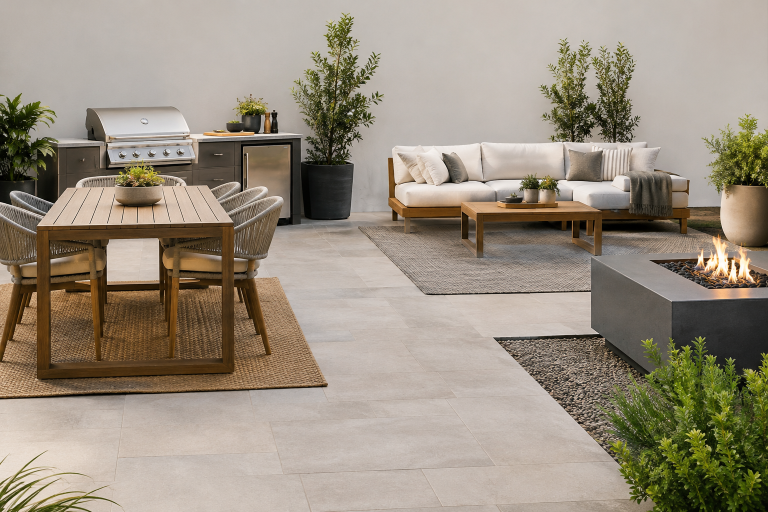
Consider prevailing wind as well as the immediate surroundings. Smoke should not regularly drift into doors, windows, or the main seating area. Keep dry leaves, outdoor fabrics, decorative rugs, and plants away from heat sources. A fire feature should also remain visible from the seating area so an adult can monitor it whenever it is in use.
Choose The Right Cooking Setup
Select equipment based on how the household actually cooks. A compact patio may only need a grill and a small prep surface. A larger outdoor kitchen may have room for a built-in grill, counter space, refrigerator, sink, griddle, or storage cabinets. More equipment is not automatically better if it limits walking room or creates an awkward workflow.
Questions To Answer Before Buying
- How many people will typically be served?
- Will the area be used for everyday meals, larger gatherings, or both?
- Will appliances use propane, natural gas, electricity, charcoal, wood pellets, or another approved fuel?
- Where will raw food be prepared, cooked food be served, and dishes be cleaned?
- Can each appliance be protected from weather when it is not in use?
Use appliances only in the setting specified by their manufacturer. Gas grills and hoses should be checked for visible damage before use, and product recalls should be reviewed before a new season begins. The Consumer Product Safety Commission provides information on outdoor gas grill and stove recalls to help owners identify affected products and available remedies.
Check Utilities, Permits, And Codes
Built-in outdoor projects can involve gas piping, electrical circuits, plumbing, drainage, structural supports, or several of these systems at once. Requirements vary by location, so contact the local building department before work begins. Ask whether permits, inspections, setbacks, or licensed installation are required for the planned equipment.
Qualified professionals should handle work involving permanent gas lines, electrical service, structural changes, or water connections. Keep appliance manuals, warranties, installation records, and inspection documents together. These records are useful when maintaining the space, arranging repairs, or explaining the work to a future buyer.
Add Comfort For More Seasons
Comfort depends on more than temperature. Shade, privacy, lighting, seating, and storage all influence how often an outdoor space gets used. Layered lighting is especially useful: brighter task lighting helps with food preparation, while softer lighting can make dining and conversation areas feel more relaxed.
- Use umbrellas, pergolas, shade sails, or covered areas to manage strong sun.
- Choose outdoor-rated furniture and fabrics designed to handle moisture and sunlight.
- Use screens, fencing, or planting to improve privacy and soften wind exposure.
- Include movable chairs or side tables that can be rearranged for different group sizes.
- Store cushions and accessories during severe weather or long periods of nonuse.
Build A Simple Maintenance Plan
Outdoor equipment is exposed to grease, dust, insects, moisture, temperature changes, and sunlight. A consistent maintenance routine can keep small problems from becoming larger repairs. Consult each manufacturer's manual for cleaning products, inspection intervals, and replacement parts.
Monthly Tasks
- Remove grease from cooking surfaces, trays, and drip areas.
- Inspect hoses, valves, connectors, cords, covers, and fasteners.
- Clear leaves and other dry debris from around heat-producing equipment.
- Check for rust, cracks, damaged seals, or loose hardware.
Seasonal Tasks
- Inspect appliances before the first major use of the season.
- Clean vents and airflow openings as directed by the manufacturer.
- Replace worn covers and damaged accessories.
- Confirm that shutoff valves and safety equipment remain easily accessible.
Use A Final Safety Checklist
Before hosting guests, walk through the space as if you are using it for the first time. Make sure pathways are clear, seating is stable, cooking tools are within reach, and hot equipment is kept away from children, pets, and high-traffic areas.
- Are heat sources positioned according to their manufacturer's instructions?
- Are fuel, electrical, and plumbing connections professionally installed where required?
- Does each appliance have the ventilation it requires?
- Are manuals and shutoff locations easy to find?
- Are combustible materials kept away from flames and hot surfaces?
- Have the required local permits and inspections been completed?
A well-planned outdoor living spacebalances comfort with practical safety. When the layout, equipment, utilities, weather protection, and maintenance needs are considered from the beginning, the finished area can support everyday meals and memorable gatherings for years to come.

FOLLOW ME ON SOCIAL MEDIA


No comments:
Post a Comment
I love reading and responding to comments but in order to get my reply you must ensure you are NOT a no-reply blogger. If you are, here are some quick steps to change that!
1. Go to the home page of your Blogger account.
2. Select the drop down beside your name on the top right corner and choose Blogger Profile.
3. Select Edit Profile at the top right.
4. Select the Show My Email Address box.
5. Hit Save Profile.